How I Raised $2,000 for Refugees by Putting a Billboard on my Grad Cap
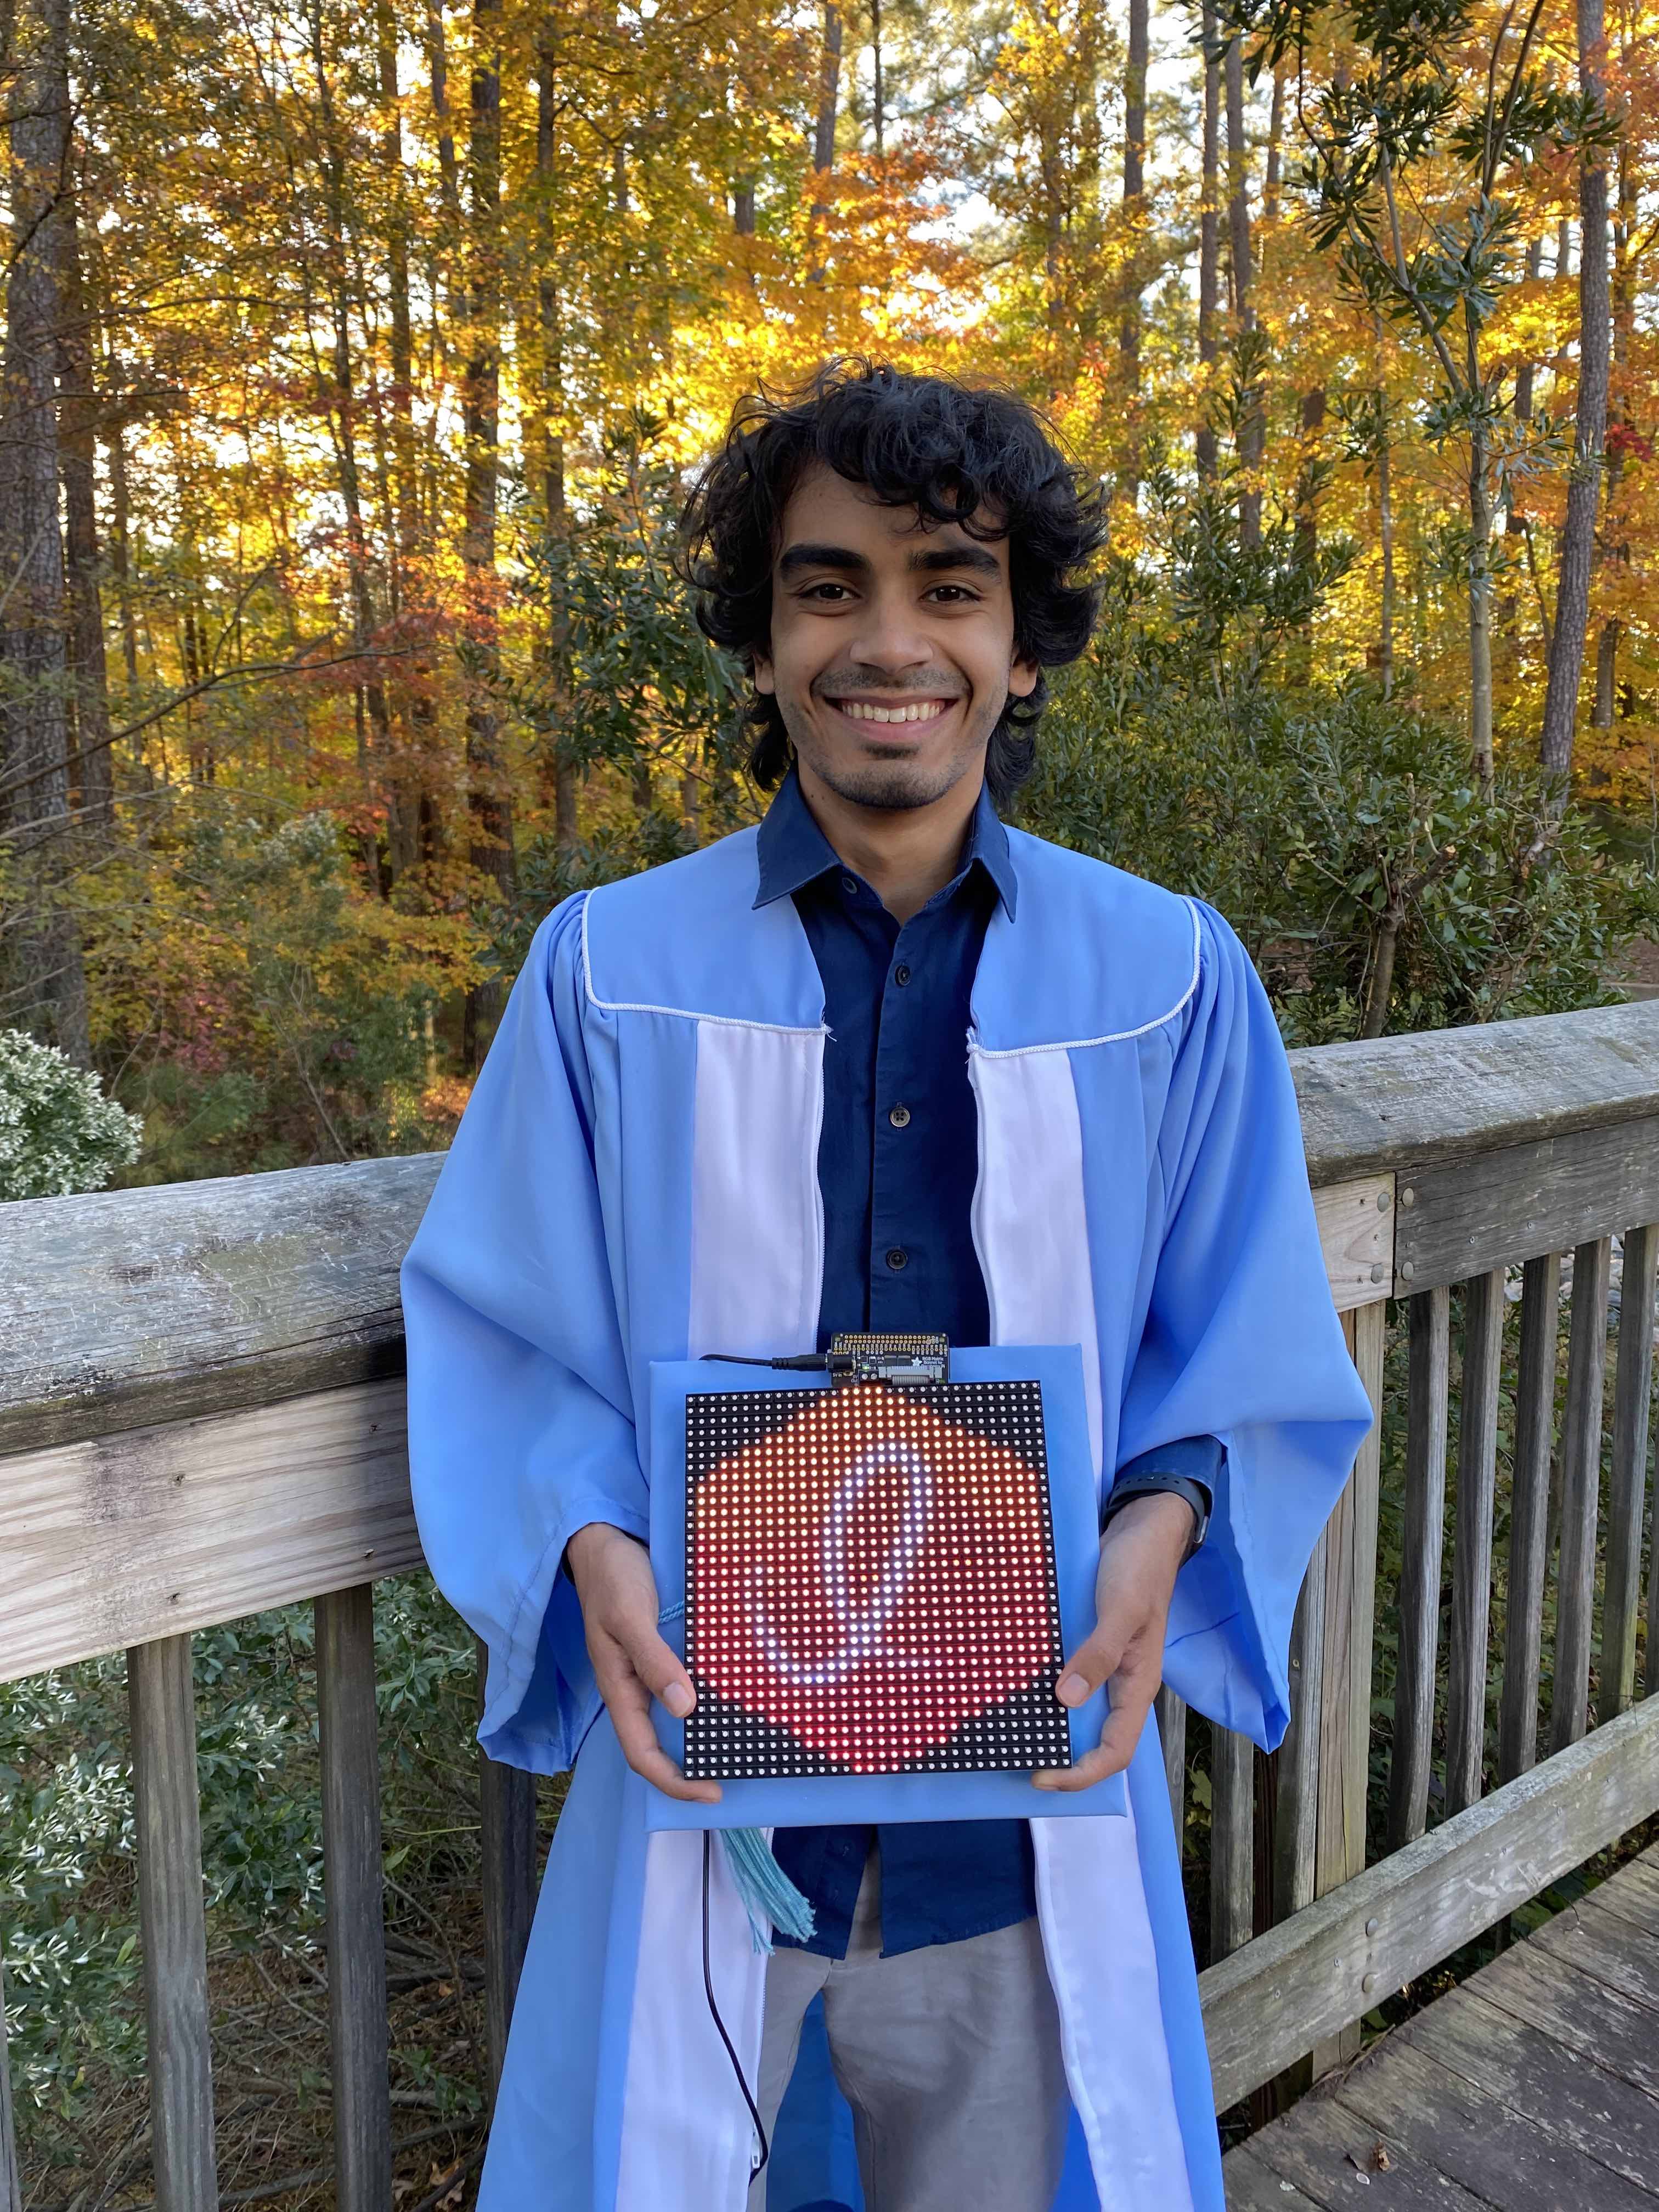
What’s that thing you’re holding?
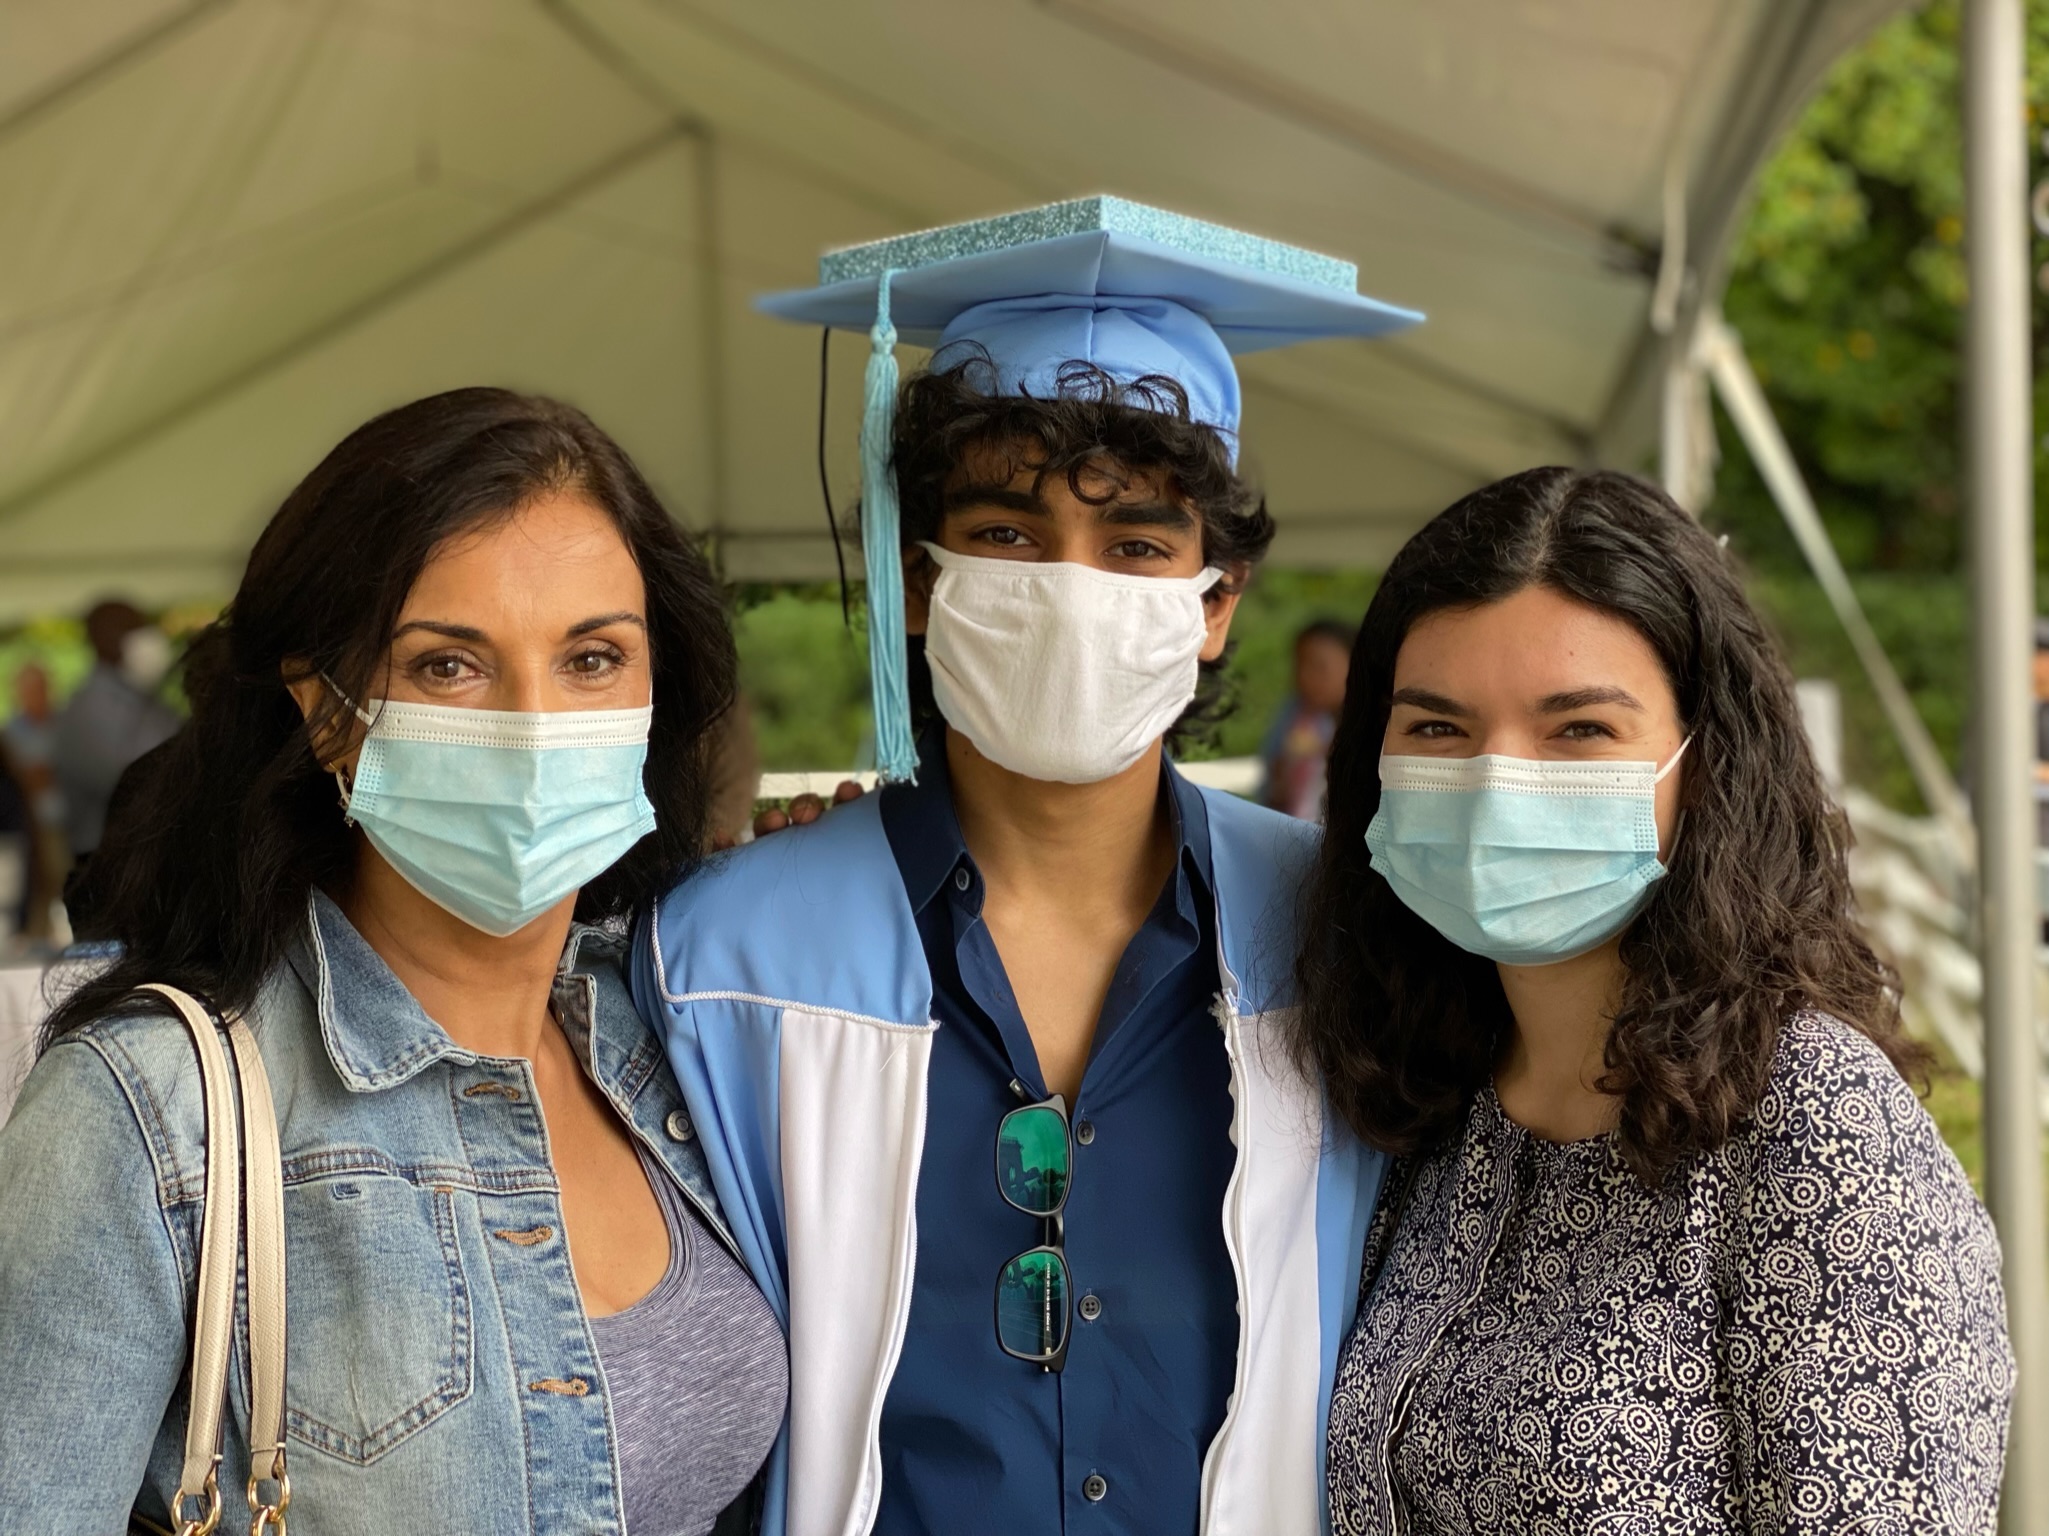
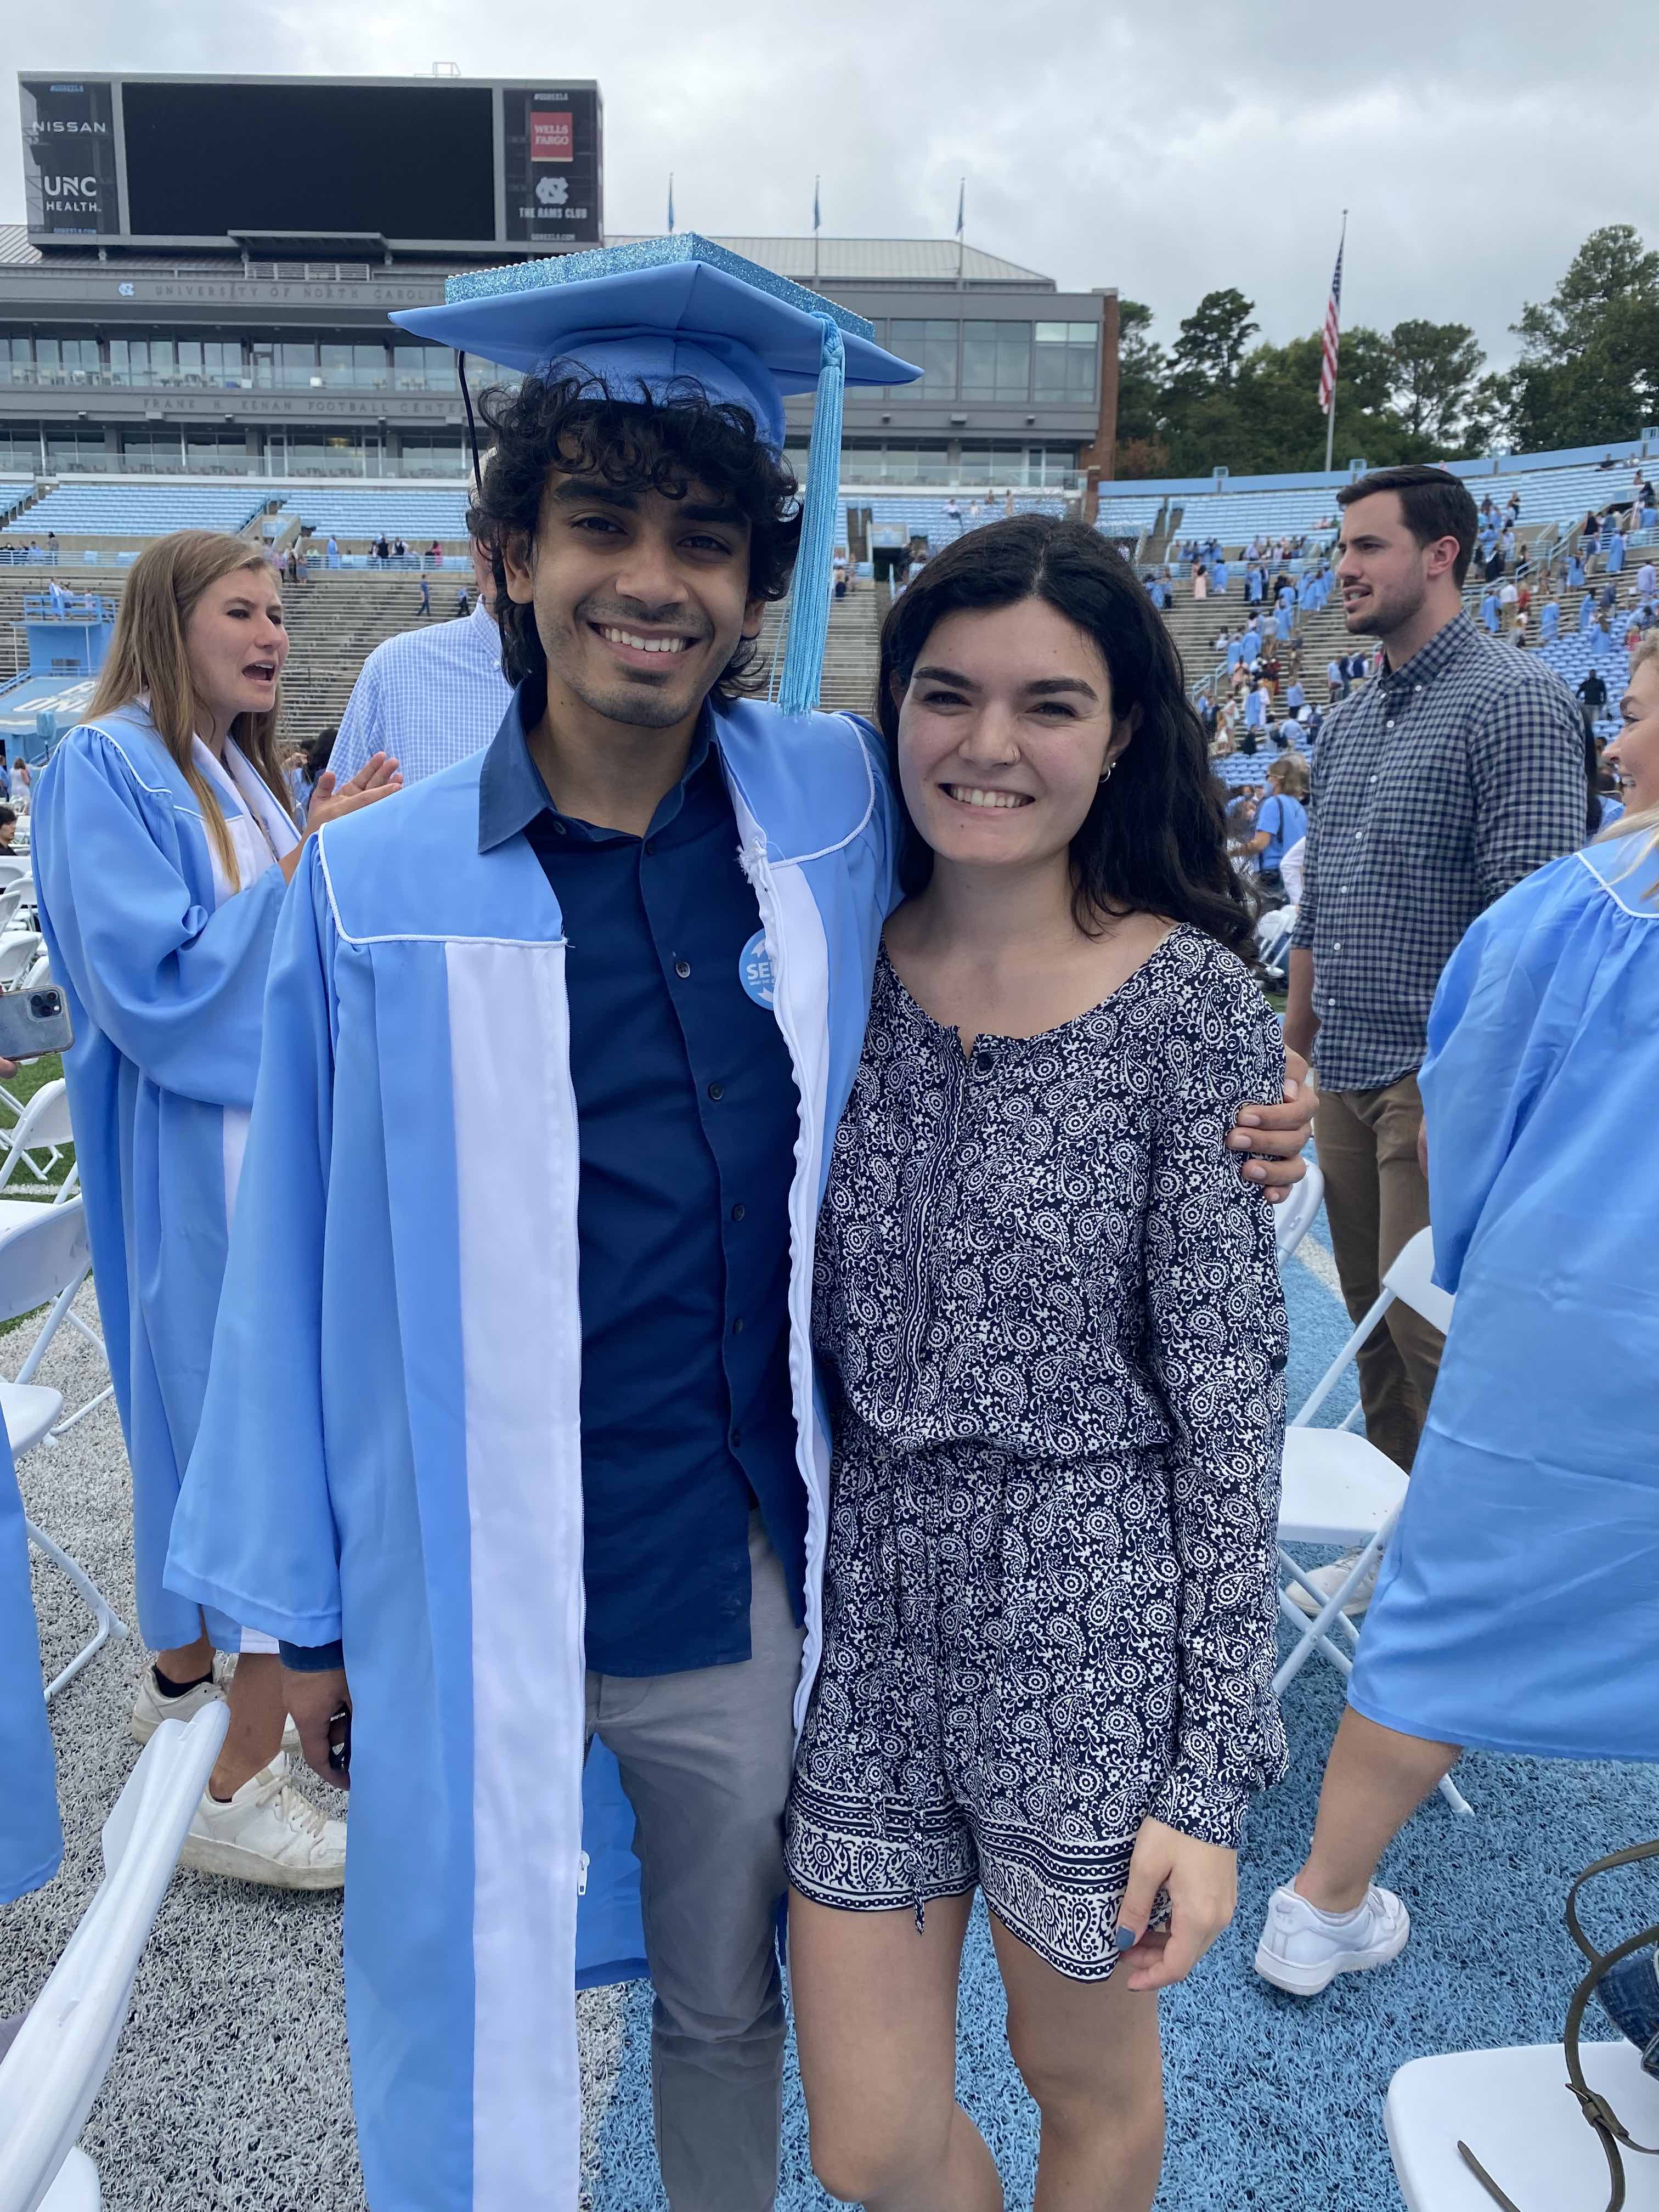
Hey, my name is Idrees Hassan and after a long delay due to COVID, I was finally able to graduate with the UNC Class of 2020 on October 10th, 2021. To celebrate, I created a grad cap with part of a billboard that can display anything you can think of! And to top it off I let anybody who donated to a charity supporting Afghan refugees submit their own designs to be shown off during the ceremony! After four weeks of fundraising, we raised over $2,000 and received dozens of submissions that I proudly wore on my head during graduation weekend! Check out this video I made about it:
For about a month, I reached out to friends, family, and strangers on the internet asking for their help donating to refugees and decorating my grad cap. And let me tell you, making the hat was nowhere near as difficult as figuring out how to get the word out. But with their generous support, we were able to raise over double the original goal for charities supporting refugees!
Read on to see how it went, how I did it, and what I learned in the process!
How did it go!
It went way better than I expected! We raised $2,274 for Afghan refugees, received 33 submissions, and the project went off without a hitch during the whole ceremony and other events that weekend!
Trust me, it's heavier than it looks
The hardware held up, the battery remained above 50% the whole time, my software didn’t let me down, and a billion bobby pins kept it all together on my head. For three days, I was able to rock a glowing graduation cap and finally graduate with the Class of 2020! Thank you for everyone who helped me with this project, and I hope this write-up can help anybody else who wants to do a project like this in the future.
What sort of things did they submit?
All sorts of things! Such low-res works of art as…


To check out all of the submissions including messages too, click here! I’ll be creating a video showing each and every design scrolling on my cap soon, so check back here or follow my Twitter (@IdreesInc) to be notified when I’m done!
So how did you do it?
With blood, sweat, tears, and craft supplies!
A completely natural, not staged at all picture of my desk
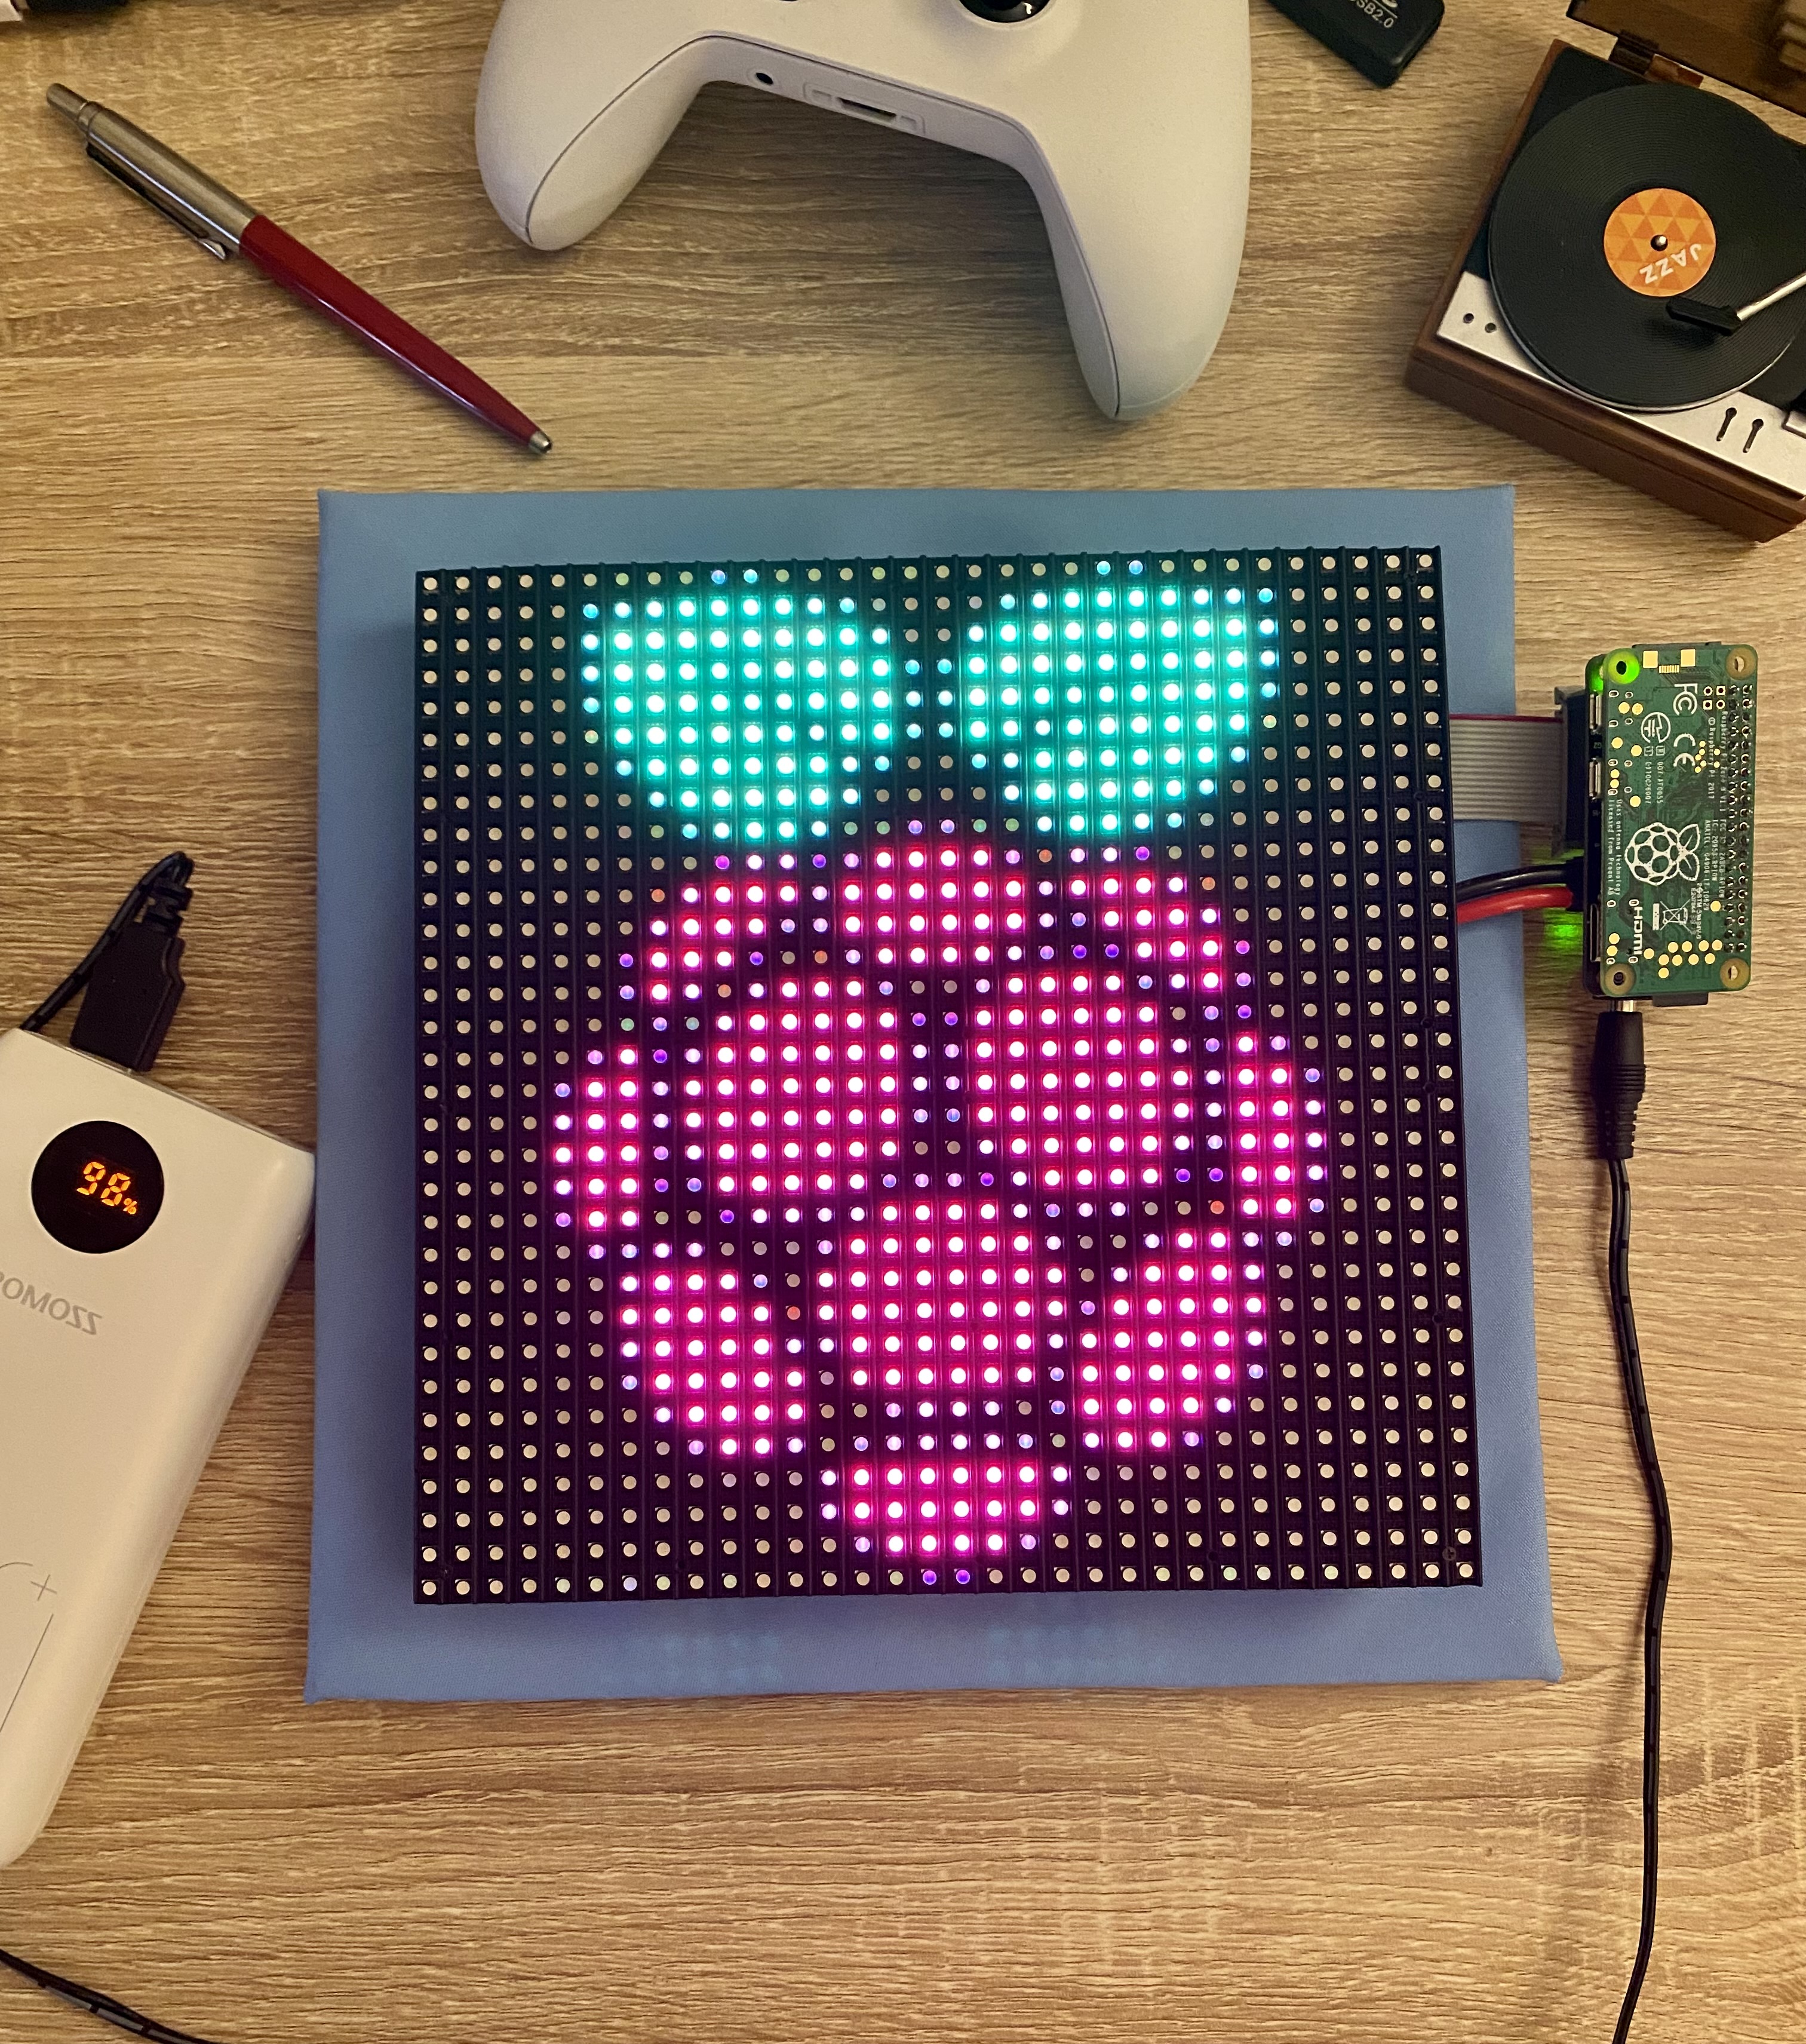
The Hardware
- A Raspberry Pi Zero W
- Dual male headers
- An Adafruit 32x32 LED Matrix w/ 6mm pitch
- An Adafruit RGB Matrix Bonnet
- An overpriced graduation cap that I stole from my girlfriend
- A 20,000 mAh portable battery
- A 6ft USB to DC power cable
- Glittery UNC blue ribbon
- Double-sided tape for the ribbon
- A high-temperature hot glue gun
- So many bobby pins
And here’s a general summary of how I built it:
- First, I soldered the headers onto the Raspberry Pi Zero W. This was necessary so that the LED Matrix Bonnet could attach to it, but not knowing how to solder made it way harder than it should’ve been (and I may have lead lungs now). I think I’ll just buy a Pi with pre-soldered headers in the future.
- Next, I popped the bonnet on, easy as pie!
- Then I stripped the screw connectors off of the power cable that came with the LED matrix and stuck the newly stripped wires into the bonnet’s screw terminals. Careful to make sure you get the polarity correct!
- To get the Pi and the cables to stay together nicely, I used some painter’s tape for cable management. It wasn’t great, but it got the job done. It’s important to make sure that the cables don’t get in the way of the matrix standing on its pins.
- Since the matrix was going to be glued onto my cap, I made sure to mark where it would go with a pencil. Remember to make sure that the matrix display is in the orientation you want it before gluing, otherwise your images will be sideways/upside down.
- I removed the magnets from the matrix’s stand-off screws and hot glued them to where I marked on the cap. Again, you really want to be sure you measured and marked correctly, you only have one go at this. Hot glue sticks to the cheap polyester like…glue.
- With the magnets in place, the matrix can now be popped onto the cap with a satisfying magnetic snap! This allowed me to remove the matrix at will while keeping it on my cap firmly enough so that it wouldn’t separate while walking around campus.
- To make things pretty, I attached a glittery UNC blue ribbon all around the edge of the matrix using double-sided tape. This hides all of the cables and adds some pizzazz. 7/8ths of an inch tape seemed to be the perfect size in my case.
- Now is the hard part. The cap is pretty heavy with the display on, so to keep it all stuck to my head I used bobby pins. I even had to avoid cutting my hair so that I’d have enough for the bobby pins to attach tightly. I used about 12 bobby pins arranged into 6 “X” shapes on my head. Luckily Miranda and my mum were there to teach me how it’s done. The bobby pins kept the cap stuck to my head pretty well (though I made an effort to not swing it around too much).
And that’s it! I kept the massive battery pack in my jeans pocket and ran the USB to DC jack up to the bonnet on the Pi to keep it powered. On a full charge, it looks like my cap would get over 15 hours of battery life even on full brightness and while connected to my phone’s hotspot. With this hardware and the software I wrote (see below), I was able to run the cap all weekend without issue.
The Software
The software side of the cap is split into two parts, the code that runs on the Raspberry Pi and the command and control center (which I’ve nicknamed the “relay” server).
The Adafruit LED Matrix Bonnet makes it easy to display individual images on the LED matrix, so I started by using the compatible rpi-rgb-led-matrix library. This library uses C but has bindings for Python and C#, so I decided to embrace the snake and write the on-device code in Python 3.
The on-device program controls what is displayed on the hat, whether it is an image or a message. It has configurable options for the length of time to display each image, the speed of text scrolling, and where to find the submissions to display. The submissions are stored in a separate folder that is a clone of this GitHub repository. The benefits of using a git repo are that I can easily update the submissions through a simple “git pull” as well as upload new submissions through a web browser if necessary. The program is setup to run on boot using crontab, so if a problem came up it’d be easy to restart by just unplugging the cap and plugging it back in.
The relay server was my favorite idea. I realized that I needed some way to control the hat as I walked around campus all graduation weekend, and the changing IP address and inconsistent network connection would make it very difficult to maintain a connection between the server and the client. So instead, I wrote a Node.js relay server that ran on my PC at home and acted as the middle-man between the web client and the Python grad cap program. Each process communicated via the ever-reliable Socket.IO protocol which meant that I didn’t have to worry about dropped connections or implementing my own retry logic. To get Socket.IO working with Python, I relied on the well-documented and easy-to-use python-socketio library.
To control the hat from my phone, the relay server runs a simple web server that provides a single-page control panel. When the grad cap connects to the relay server (usually via my phone’s hotspot), the web client on my phone allows me to set the brightness and manually select the image to display. Given more time (I only started the web server about two days before graduation) I’d have probably added the ability to display custom text and modify the time per design, but overall it was more than enough to keep me in control all weekend. One thing that I wasn’t expecting was for my phone’s hotspot to give out near the stadium due to thousands of student’s and their families saturating the cell towers. Luckily my cap doesn’t need WiFi to function and a quick power reboot removed any manual overrides I had set via my control panel.
Since I couldn’t be sure that nothing would go wrong with my cap, I installed ngrok and setup the crontab to forward ssh on startup so that I could connect to the Raspberry Pi while on campus. I never ended up needing to use this as any problems that might have came up could be easily solved by unplugging and plugging the cap back in. I did test it while on campus just to see if it worked and was easily able to SSH through the ngrok tunnel from my phone.
Lastly on the software side, I created an LED matrix web editor that allows people to draw their own custom designs!
See the Pen LED Matrix Editor by Idrees (@idreesinc) on CodePen.
Features include a full drawing suite (so you can draw all the 32x32 art you desire), image importing with automatic downscaling, and the ability to export designs as images. This web app made it not only easy to draw your own designs but also allows you to get a better understanding of what your design might look like on my cap. A lot of the people who donated were strangers on the internet which meant they couldn’t just stop by and see what their potential design might look like in-person. I tried to take out the guesswork by developing an editor as similar as possible to the actual LED matrix, and in practice I think it turned out pretty good.
All programs developed for this project are open source and are available on GitHub, check them out and give ‘em a star if you like what you see!
And if you’d like to see how I struggled through each step of the software, check out my dev journal here!
What I learned while fundraising
God dang, fundraising is hard.
Well okay, fundraising from family and friends was easy, but that’s only because my family and friends are lovely people and care about this cause. But getting money from strangers, now that was where things got difficult. While overall I am very satisfied with the results, if I could do it all again I would definitely change a few things.
First, I would not have introduced people to my project with such a long and detailed web page. I was focused on documenting my project thoroughly to make sure everything was clear and well-explained. But in the process of writing almost 2000 words, I actually made it harder for someone to quickly glance at my project and understand what is going on (and more importantly, how they could help). Two thirds of the way into my fundraising I wrote up an elevator pitch of sorts to quickly get my point across, and I wish I had done this first as it definitely got to the point faster.
Second, I learned that “exposure” does not directly lead to raising more money. My LinkedIn post received 1,400 views and 22 reactions, but no “conversions” as the marketing folk say. My first tweet did better with over 4,000 views and 351 “engagements”, but only a few people decided to donate after seeing that. What worked best was making posts that directly targeted a certain community that I thought might be interested in my project.
The posts that succeeded were in fact the ones that I had never originally planned on making! On a whim, I decided to post to the UNC subreddit with a pic of the UNC logo on my hat.
And while I only got a total of 89 upvotes, this was the first post that actually got strangers to start donating. It looks like the combination of being more casual and reaching out to people within my community was better for fundraising, especially since UNC students/faculty are more likely to support a cause that directly relates to UNC graduation. From that post, I was recommended to post to the Raspberry Pi subreddit.
This post was way more popular with 1,900 upvotes and it reached the top of the “Hot” section in that subreddit for a couple of days. And again, I was able to get a few more submissions from people who wanted to support the cause. One fun thing about posting on the Raspberry Pi subreddit was that I was able to talk with people who were more interested in how my project worked rather than just what I was doing, which was great and one of the reasons I am writing this post-mortem now.
I was also able to get some nice traction on Twitter by targeting communities I am passionate about. My general tweets did alright with the help of my family and friends, and I can’t complain considering I made the account only a couple of months ago. But it was my tweets at particular people/groups that really gained momentum. I called these my “Hail Mary” tweets since I wasn’t expecting them to get anywhere but I figured I might as well give it a go and see what happens. I tried tweeting at the Zakat Foundation with their logo on my cap and while that didn’t take off (though they did reply!), I was inspired to tweet at some more accounts. I tweeted at Adafruit with a pic of their logo on the hat and didn’t receive a reply or response. But a few days later (and only two days before my graduation), they posted about my cap on their blog!!! You would not believe how excited I was about that, especially since I got the idea for this project while scrolling their storefront and noticing that their LED matrixes were conveniently just the right size for a grad cap. This gave me the confidence to try tweeting at some other popular accounts like the author of SMBC, Zach Weinersmith, who I know cares about the refugee crisis. What I wasn’t expecting was him to retweet my tweet and cause it to gain over 100 likes and almost 13,000 views!
Shout out to @ZachWeiner for always giving me a laugh before the daily slog to my 8AMs#UNC #Classof2020 pic.twitter.com/5sOpByZXcb
— Idrees Hassan (@IdreesInc) October 8, 2021
While I’m not sure if this caused any more donations since I made that tweet so late in the game (the day before the ceremony), I was still super thrilled to get a shout-out from someone whose content I love.
In summary, fundraising is a whole different ball game than just developing a project. Given the opportunity to do it all again, here’s what I would change:
- Make the description of my project shorter
- Give myself more time for fundraising
- Take better photos of my project using a professional camera
- Post more about the project’s development process
- Make more “long shot” posts
Conclusion
This was easily my favorite project I have ever made yet! The hardware was interesting, the software was fun, and I got the chance to help out a cause I truly believe in. It was also my most exhausting, with many dozens of hours spent after work planning, debugging edge cases, and learning how to be my own social media manager. I’d like to thank my family and friends for their amazing help and for being such great test subjects. I’d especially like to thank my girlfriend Miranda, without whom I would never have been able to complete this project. If you have any questions or comments, please feel free to use the comment section below!
Want to get in touch and talk about one of my projects, opportunities, or just feel like chatting?
Feel free to comment below or email me at idrees@@example.comidreesinc.com
Check me out on Github: https://github.com/IdreesInc
Reach out on LinkedIn: https://www.linkedin.com/in/idrees-hassan/